You can ‘code’ your sources to gather material about particular themes and topics – for example, you could create the node water quality and as you explore your sources (documents, PDFs, datasets, audio, video or pictures) you could code all references to water quality at the node:

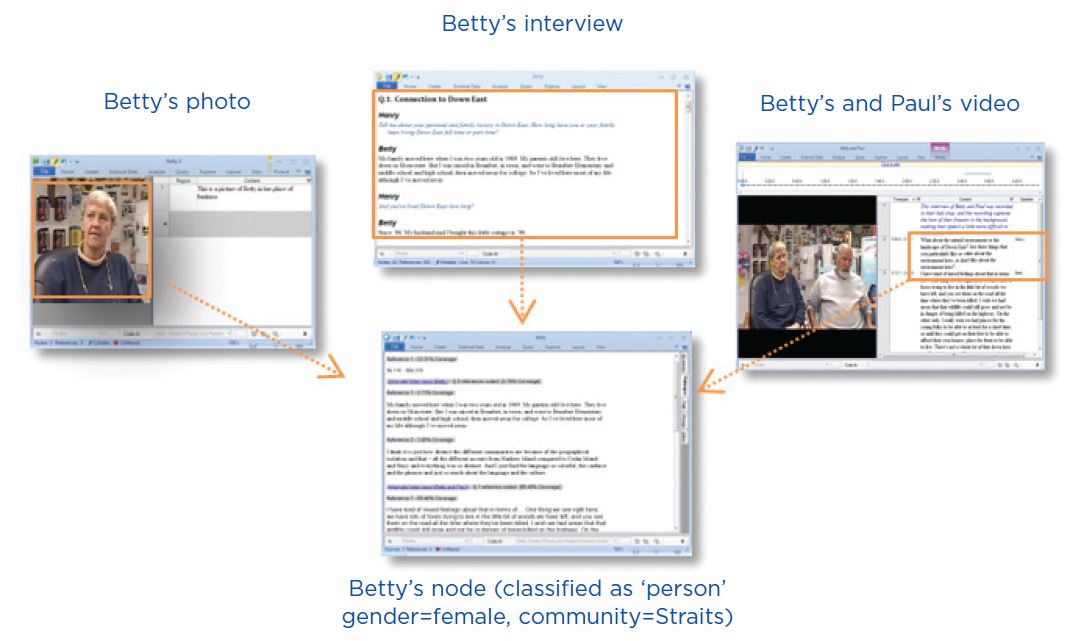
You can also code to gather material about a person, place or other case:
Add nodes before you start coding
If you already know what themes you are looking for (based on your literature review, for example) – you can create and organise the nodes before you start coding:
- In the Navigation View, click Nodes.
- On the Create tab, in the Nodes group, click Node.
- Enter a name and description.
- Click OK and the new node is added to List View.
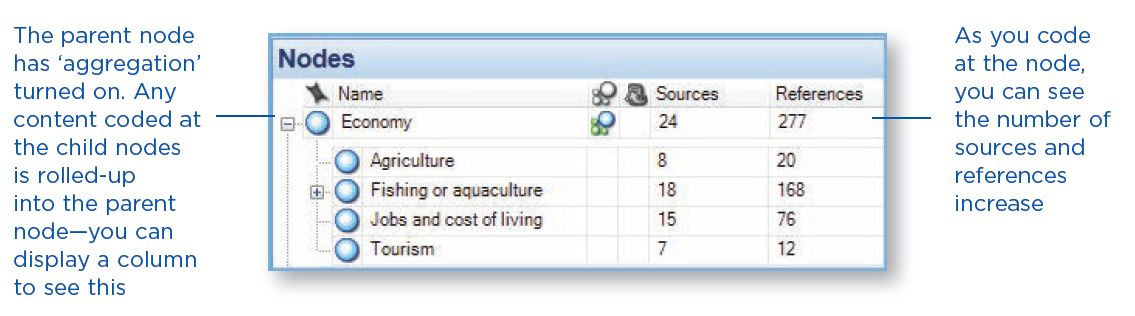
- You can add ‘child’ nodes (sub-nodes) under the new node and create a node hierarchy:
Code at existing nodes
As you explore your sources, you can code at the nodes you have created:
- Display your nodes in List View and open a source in Detail View.You may want to display Detail View on the right – on the View tab, in the Workspace group, click Detail View and then click Right.
- Select the content you want to code. The content you can select depends on the type of source you are working with. [Expand]
- Drag the selected content to the node.
You can also code by:
- Clicking options on the ribbon – on the Analyse tab, in the Coding group, click Existing Nodes.
- Using keyboard shortcuts [Expand]
- Using the Quick Coding bar (at the bottom of Detail View) to code content at existing nodes:

Create nodes as you code
As you explore your sources you can create and ‘code at’ new nodes:
- Open a source in Detail View.
- Select the content that you want to code. the content you can select depends on the type of source you are working with. [Expand]
- On the Analyse tab, in the Coding group, under Code Selection At, click New Node.

The New Node dialogue box opens
- If you want to change the folder location for the node, click the Select button.
- Enter a name and description.
- Click OK.
When you create a new node it is added to the selected location in the node hierarchy – you can reorganise and work with the node in List View.
You can also use the Quick Coding bar (at the bottom of Detail View) to code selected content at new nodes:

Make a node from a selected word (In Vivo code).
You can also use ‘in vivo’ coding to create and code at new nodes – the selected word or phrase is used to name the node and is (at the same time) codes at the node. This is useful if you want your nodes to reflect the language of the people you have interviewed.
- Select the text content you want to code.
- On the Analyse tab, in the Coding group, click Code in Vivo (or click Code in Vivo on the Quick Coding bar).
See what you have coded
To see what has been coded in a source, you can:
- Turn on coding highlight – on the View tab in the Coding group, click Highlight, and then select a highlight option.
- Turn on coding stripes – on the View tab in the group, click Coding Stripes, and then select an option. Coding stripes are displayed on the right of the source:

Open a node to explore the references
You can open a node to see related references gathered in one place:
- In Navigation View, click Nodes.
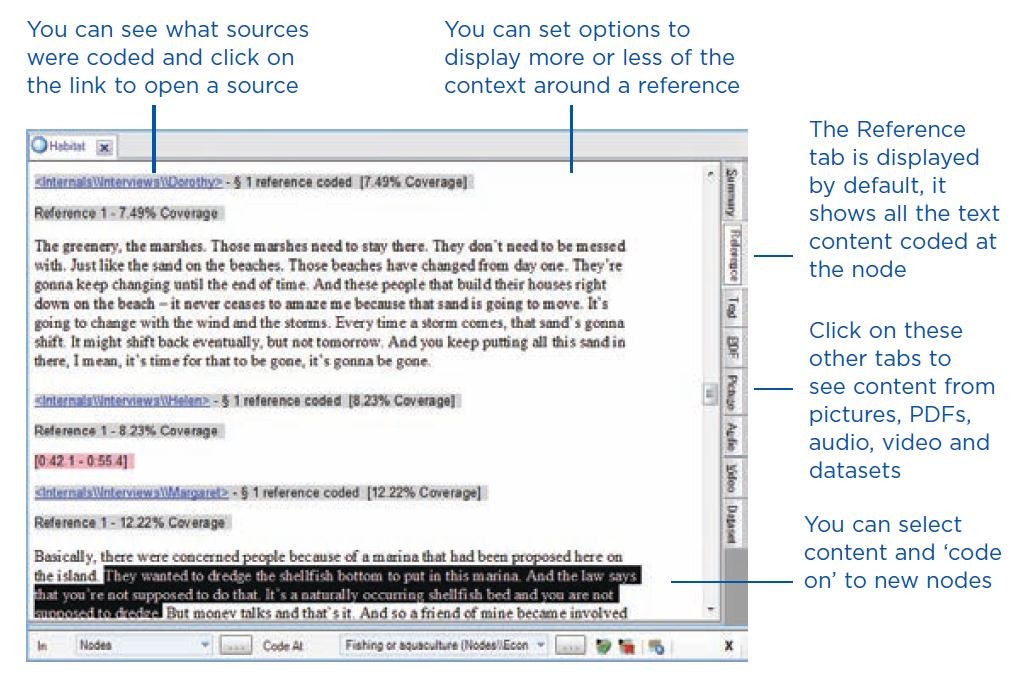
- In List View, double-click the node you want to explre. The node is opened in Detail View:
Accompanying video:
2 thoughts on “Day 5 – Coding themes”
Comments are closed.