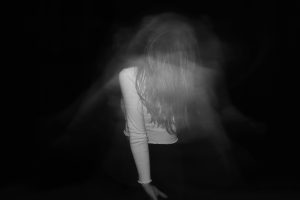
Long exposure
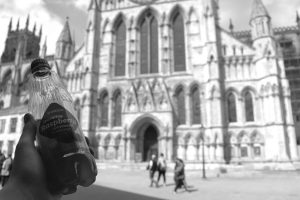
Depth of field
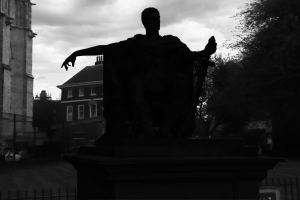
Silhouette
Reflection

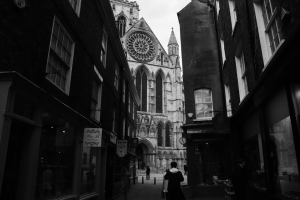
Frame within a frame
Forced Perspective

The photography artefact includes six individually produced images demonstrating all 6 techniques from the brief which includes; long exposure, silhouette, reflection, frame within a frame, forced perspective and shallow depth of field. All fitting within my overall theme of ‘black & white’.
For this artefact we had to work in pairs and we only had a 5 hour timetabled slot to capture our six photographs each in our pairs so preparation was key to ensure that we were productive. I decided to produce a storyboard of the six shots that I wanted to capture. When I was capturing the photos, I took as many photographs as possible to ensure that I had quantity and quality when I reached the editing stage. Due to forward planning and careful consideration of location, it made it easier to get the photos I wanted for the artefact (Bamford 2012). This places emphasis on the importance of pre-production as planning ensures that you are taking time and consideration to plan ahead of production.
When creating my depth of field image I ensured I used a wide aperture so that it concentrates the interest on the chosen subject which in my shot was a drink bottle. I also took upon Langford skills (1986 p.41), as he suggests that to demonstrate depth of field you should use a variety of items at various distances from the lens. The lens aperture was also considered important and it was controlled for dimming and brightening the images.
Creating a silhouette shot was the most challenging aspect of the artefact as I don’t have much camera skills. I decided to research the camera techniques on Improve Photography to ensure I has the right settings. It took time to adjust to the perfect setting but I managed to create a stunning silhouette shot and I would feel confident in doing this again.
When I reached the post-production stage I used Adobe Premier to edit my images. This software was easy to use and this was the stage where the development of my theme began. I transformed all my images to black and white and adjusted the light and exposure to so that more definition was made within the images. Apart from adjusting the images colour there was not too much editing that was needed as a lot of the techniques has been demonstrated through the camera skills rather than editing.
I’ve learnt that health and safety in production environment is important (Verrall, 2006) which is why a risk assessments was made for each location of filming so me and my partner were not at risks. During our shoot on location, which was in York city centre, the main risk was the public with our equipment and them not being aware. The risk management we incorporated was to not set our cameras in busy areas, narrow walk ways and ensure that there was no trailing of wires across the pavement. We also had a production schedule which was the glue that held the production together as without the schedule we wouldn’t have been able to get the images I had in mind (Brown, L. Duthie, L 2016).
Bibliography:
Bamford, N (2012) Directing television, a professional survival guide. London, Bloomsbury.
Brown, L. Duthie, L (2016). The TV Studio Production Handbook. I.B Touris
Langford, M. (1986) Basic Photography 5th Glasgow, Eagle Colourbooks Ltd.