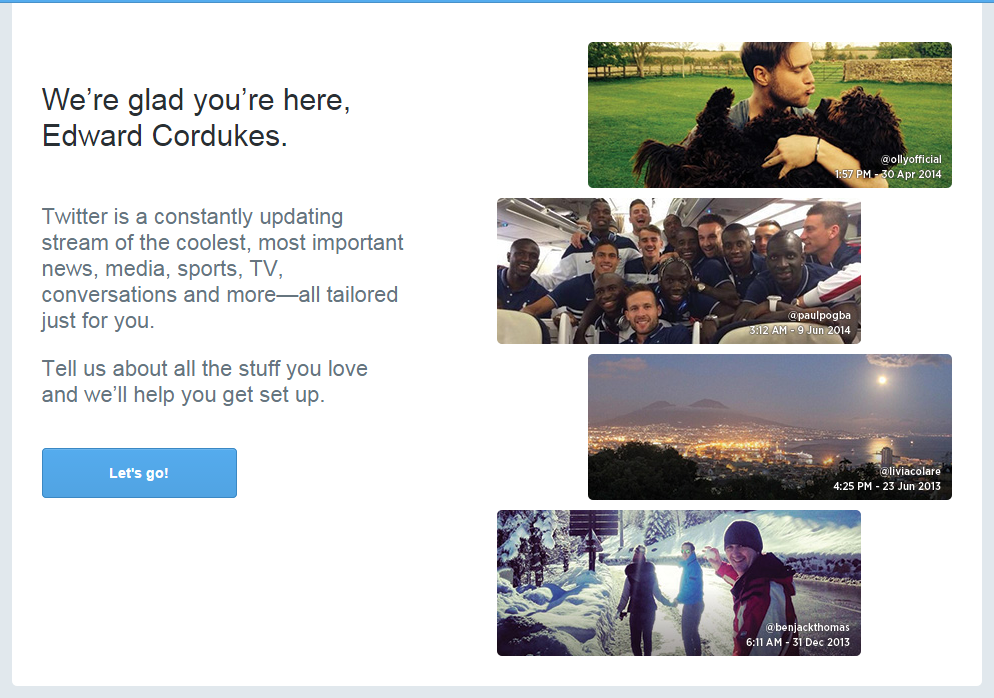
Day 1 of #YSJ10DoT: Creating and personalising your Twitter account
Hello! And welcome to the 2017 iteration of 10 Days of Twitter!
To start off with, you’ll need to sign up to Twitter. You can see people’s tweets without an account, by viewing their profile or by searching for a keyword, as it’s a very public social media channel. Without an account, though, you won’t be able to join in the conversation, and that’s the first and main thing to learn about Twitter:
Twitter is a conversation.
Setting up an account on Twitter is the easy part! There are still a few things to think about, though, in terms of creating an engaging and effective profile:
- your handle (@name e.g. @PhilVincent, @RosieHare, @emmfletcher, @YSJTEL), which people will use to identify and direct messages to you
- your avatar or profile picture, which is how people will pick your tweets out of their twitter feed at a quick glance
- your identifying information, such as your location and personal website, LinkedIn profile, or Academic Profile page
- your ‘bio’ or strapline, which will sum up who you are and why people might want to follow you
- the overall look of your twitter profile, which makes it distinct and memorable when people view it
- and additional accounts, which you might want to set up to appeal to different audiences.
If you already have a Twitter account, then you could use this post to refine your profile and your overall aims and audience, including if you feel you need a second account for different audiences and purposes.
If you don’t yet use Twitter, visit the site to set up an account – it’s probably best and easier to this on your desktop computer rather than your mobile device.
To create an account:
- Go to http://twitter.com and find the sign up box, or go directly to https://twitter.com/signup.
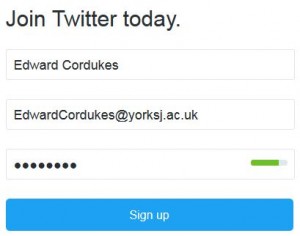
- Enter your full name, email address, and a password.
- Click Sign up for Twitter.
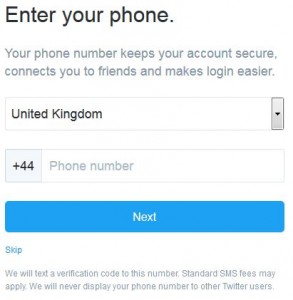
- You will then be asked to enter your phone number, either enter it and click Next, or you click the Skip link to skip this step for now:
- On the next page, you can select a username (usernames are unique identifiers on Twitter) — type your own or choose one they suggest. Twitter will tell you if the username you want is available. If you want to set up an account which is not for yourself but for your faculty, programme, department, or other institutional group such as a conference, then something which will be memorable, clearly reflect your service, and work well on publicity will be essential.
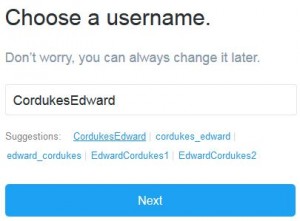
Tips for picking a username:
- Your username is the name your followers use when sending @replies, mentions, and direct messages.
- It might be a version of your real name or, if your name is common and most variations of it have already been taken, you might think of a professional and memorable pseudonym.
- It will also form the URL of your Twitter profile page. Twitter will provide a few available suggestions when you sign up, but feel free to choose your own.
- Usernames must be fewer than 15 characters in length and cannot contain “admin” or “Twitter”, in order to avoid brand confusion.
- Avoid using numbers, hyphens and underscores as this will make it harder for people to be able to find you online.
- Please note: You can change your username in your account settings at any time, as long as the new username is not already in use.
- Double-check your name, email address, password, and username and click Sign up. You may be asked to complete a Captcha to let Twitter know that you’re human.
- On the ‘What are you interested in?’ page Twitter will suggest accounts for you to follow based on your interests. We are going to covering following people on Day 3, so you can opt to ‘skip this step’ for now if you wish. Twitter will suggest up to 20 accounts for you to follow based on your interests, if you decide to proceed.
- Next, you will be asked if you want to find friends on Twitter based on your email contacts. You can skip this step if you don’t want to find anybody from your current email contacts.
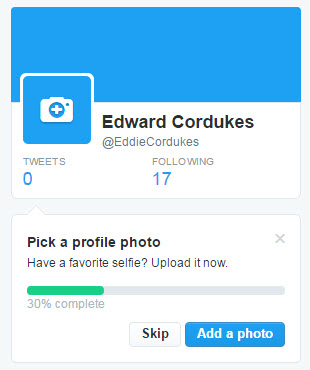
- The next stage is to ‘Customise your Profile’. Here you can add a profile picture for your Twitter account (recommended dimensions are 400×400 pixels). It could be your face, if you have a good, clear shot of your face. It could also be an abstract image which somehow reflects your @name, as long as it’s striking.
- Your account should now be set up. Twitter will send a confirmation email to the address you entered on sign up, make sure you click the link in that email to confirm your email address and account.
Important information about your email address:
- An email address can only be associated with one Twitter account at a time.
- The email address you use on your Twitter account is not publicly visible to others on Twitter.
- Twitter uses the email you enter to confirm your new Twitter account. Be sure to enter an email address that you actively use and have access to. Check your inbox for a confirmation email to make sure you signed up for your account correctly.
- Staff and students could make use of their YSJ email accounts to create second, or ‘disposable’ accounts, if they don’t want to use their personal accounts for teaching and learning.
Personalising your profile
The next thing you should do is start to fill out your profile, so that when people look at it, they will feel more encouraged to follow you. To do this click on your profile picture and View Profile (or ‘Me’ on a mobile device), this will take you to your profile page. On the profile page, you should be able to see an ‘Edit Profile’ button. Click it to update your profile:
- Add your real name, if you wish. This will appear on your profile, so if you use an abstract pseudonym and picture your Twitter account can still be identifiably ‘you’. If you use Twitter to represent a service or group, then the ‘full’ version of its title would be something to add here.
- Add a location (this could also be an institution). Your followers might be from anywhere in the country or the world, so this gives people a bit more context about which university you are affiliated with.
- Add a URL to a personal website or webpage. You can have only one, so perhaps your university webpage, if you have one, would be most appropriate here. People can then find out more about you than is possible in your Twitter profile.
- Add a ‘bio’. You have 160 characters to sum up who you are and what you might be tweeting about, to encourage people and give them a reason to follow you. Again, a blank or minimal bio isn’t very inviting, and suggests that you are too new to be interesting, that there is little to be gained from following you, or you are a spam account. A well-thought out bio is an important part of gaining new followers. Have a look at the bios on other tweeters’ profiles, and see what you find inviting or off-putting. If you intend to tweet in a professional capacity, then avoid too much about your hobbies or quirky, cryptic statements about yourself. It tells potential contacts nothing about why they might want to follow you and what kinds of information you are likely to be passing on to them, and therefore why they would want to network with you professionally. Some people like to add that they are “tweeting in a personal capacity” or that the “views are my own” to clarify that their tweets do not reflect the views of their employer, although you may feel that this is clear enough anyway.
- Add a header photo. This will appear at the top of your profile page and acts as cover photo for you Twitter account. The recommended dimensions for Twitter header picture are 1500×1500 pixels. However, there are a number of online services such as TwitrCovers and Fotor that can provide you with a Twitter header or assist you with creating one.
People will often view your profile page when deciding whether to follow you, and you might give out the URL to your profile page e.g. on your email signature or business card if you want to ask someone to follow you, so it is worth making it informative and distinctive.
You can create more Twitter accounts associated with different email accounts, if you wish. These might be for other facets of your online life, such as personal contacts, or to represent your learning development service or enterprise rather than you as an individual. It’s best not to mix audiences too much – for example, if you use Twitter for a hobby, then a separate account for professional purposes means that you aren’t filling people’s Twitter feeds with things that don’t interest them or confuse them. It’s fine to add a personal touch to your professional tweets though, it’s important to be authentic!
Now, to let us know how you’re getting on, why not leave a comment on this blog post with your twitter handle and a link to the URL of your profile? Or if you have any questions, let us know by leaving a comment.
Don’t forget to join in with all of the activities to earn your ‘Hatched’ open badge. See the #YSJ10DoT Open Badges page for more details on how to earn all three course badges.
So – you have an account on Twitter now, with an engaging profile which invites others to follow your tweets. That’s enough for Day 1!
Rosie (@RosieHare)
Further reading:
- Twitter: Signing up with Twitter
- Twitter: Customising Your Profile
- Twitter: Customising your Design
- 7 reasons people don’t use Twitter and why ‘it’s a conversation’ is the answer to all of them
- Twitter Essential Training on Lynda.com
| <<< 10 Days of Twitter | Day 2: Sending Tweets >>> |
 Ten Days of Twitter for Learning Developers was originally adapted from a similar programme for STEM researchers, also created by Helen Webster. The materials are available under a Creative Commons license CC BY-NC-SA.
The 10DoT Badges are adapted from those issued by University of Sussex’s Technology Enhanced Learning Team, which were also licensed under a Creative Commons Attribution-NonCommercial-ShareAlike 4.0 International License.
 Ten Days of Twitter has been adapted by Technology Enhanced Learning for use at YSJ, and is licensed under a Creative Commons Attribution-NonCommercial-ShareAlike 4.0 Unported License.
We are extremely grateful for the work put in by Helen Webster and the LD5Digital Things team, and for sharing their great resources with the community!

