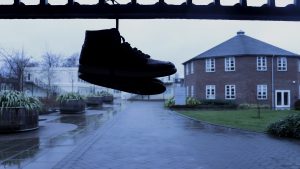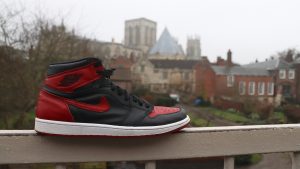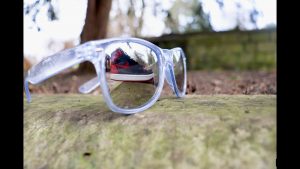


For our photography task, we had to work in pairs to produce a collection of six photographs based on a theme, each demonstrating six specific techniques.

‘Another reason for taking up photography is that you want a means of self-expression’ Langford (1986 p.2)
Based on this I decided to choose a theme that I am interested in so I could express myself. I decided to choose trainers, this is something that I am interested in and is a relatively common item that can be captured beautifully through photography techniques.
We only had 5 hours of timetabled slots to capture our six photographs each in our pairs so preparation was key to ensure that we were productive. I decided to produce a story board of the six shots that I wanted to capture. This allowed me to focus solely on the six techniques that we needed to demonstrate in our collection when we were shooting. When I was capturing the photos, I took as many photographs as possible to ensure that I had quantity and quality when I reached the editing stage.
Langford (1986 p.41) suggests that to demonstrate depth of field you should use a variety of items at various distances from the lens. The lens aperture is also an important control for dimming or brightening images. I ensured I used a wide aperture as although this limits detail in the shot, it concentrates the interest on the chosen subject which in my shot was a trainer. It is also important to ensure that there is not any unwanted clutter in the shot that can draw focus.
‘here are two recommendations:
- Respect the privacy and property rights of one’s subjects.
- Never use deceit in obtaining model or property releases’ Wright (2004 p.179)
When I was taking pictures, I was aware of the ethics that I needed to comply by. As my theme was based on trainers, I did not have any models within my collection so consent was not an issue. I ensured that I did not take pictures on any areas that were private property or where I did not have permission. When we were taking our pictures, we were cautious to ensure it was safe. We were carrying a tripod which we ensured was safely stable to prevent any risks as it is heavy.
The silhouette shot was difficult for me to capture as I was new to photography and had little experience. I decided to research the camera techniques on Digital Photography School to ensure I had the right settings. I spent some time adjusting the settings to perfectly match my shot and I would feel confident in doing this again.
When I reached the post-production stage I used Adobe Premiere to edit the collection of photographs. This was easy to use and not too much editing was needed as a lot of the techniques had been demonstrated through the camera skills rather than editing.
Bibliography
- Langford, M. (1986) Basic Photography 5th Glasgow, Eagle Colourbooks Ltd.
- Wright, T. (2004) The Photography Handbook 2nd London, Routledge.
- Digital Photography School (2018) How to photograph silhouettes in 8 easy steps [Internet]. Available from https://digital-photography-school.com/how-to-photograph-silhouettes/[Accessed 23rdFebruary 2018]

Hi there, I found your website via Google while searching for a related topic, your site came up, it looks great. I have bookmarked it in my google bookmarks.